General Information.
Over the last few years many amateur photographers have been tempted to buy studio lighting kits to use for mainly indoor work. A large number of brands have appeared from the far east to compete with the more established English, American, and Swiss brands. Anyone looking for a dealer could consult my friend Graham at his website www.gwdigitalandphoto.com for sales advice on what is needed. For beginners its often advantageous to buy a kit that includes some of the very necessary accessories like stands and reflectors etc. You will also need a flash meter.
Lets assume that you have acquired a set of studio lights. Most of the products on the market have the following features:-
1 A modeling light that works in tandem with the flash tube. These can be adjusted from zero up to about 5 stops of light (depending on the particular unit) The function of the modeling bulb is to mimic the effect of the flash when it occurs. Effectively, all of the light aiming is done with the modeling light and the exposure with the flash tube, so an important criteria in designing the unit is to make the spread and distribution of the two types of light as similar as possible. Cheap brands might not be very good in this respect.
2 There is the odd occasion when it would be desirable to shoot with flash and not have the modeling light switched on, so a switch is usually built in to facilitate this.
3 The strength or power of the flash is adjustable. This is indicated digitally on most modern lights. They are easier to see in a dim studio but no more efficient than the dial type adjusters they have superseded.
.
4 When looking through a camera lens it is difficult to see if all of the flash units have worked so most have either an audible or visual signal, or both, to indicate that each particular unit has fired. On some units the modeling bulb dims after the flash has fired. I prefer the audible signals peeping around the studio in complex shots though it is largely a matter of what you are used to.
5 All of the lights have to be synchronized with the shutter to work at exactly the same moment to give correct exposure. This is achieved by one flash unit being in sync with the camera hot shoe or sync plug. Slave receptors built into the other units then cause them to fire as the camera shutter is opened. They work by UV light. There is also usually a jack plug socket for additional slaves to be used if necessary. Wireless connections are more reliable as the signal is less directional than UV light. It is also possible to link units together with a wire. An old fashioned method that wasn't very reliable.
6. Flash units are attached to lighting stands with a standard spigot usually supplied with the stand rather than the light unit.
7. If they are to be transported in a car a substantial case is needed.
8. Flash units are powered by capacitors that are quite powerful enough to give you a fatal electric shock. There should be a dump button to allow you to discharge the flash power down the earth cable.
9. The cost of the flash tube is about half of the complete unit and it is very fragile. Retain the plastic or metal caps used in transit to protect your flash unit
.
10. Lights on tall stands are very unstable things. Toddlers,cats, and adults have all managed to knock mine over so I weight the base with gravel filled canvas bags. These are homemade.
In order to measure the light you will also need a special form of light meter called a flash meter. Flash meters are able to measure sudden pulses of light and to trigger the flash units to enable the light emitted by sepate units at different strengths to be measured collectively. (See my other blog on Lighting Ratios.)
 |
| Soft box over object. |

In this picture the contrast is at its maximum rendering the background black at the top and then becoming white at the front.

Now the sheet hanging down from the soft box has been folded in half along its length allowing more light to spill on to the background sheet, reducing the contrast to mid gray.

The sheet has now been removed completely .
A simple sheet of paper can make a lot of difference in the lighting effect.
The big problem for most beginners with limited space and equipment is to support the soft box over the light table. This was done with a boom arm fixed to a substantial lighting stand. The stand was weighted at the base with gravel filled bags. A light weight stand might have tipped over if it was cantilevered too far.
Flash meters.
In order to measure the strength of the light its necessary to have a special type of light meter called a flash meter. Almost all of the flash meters on the market are also conventional light meters very similar to the ones built into most cameras. Built in camera light meters are unsuitable for measuring very short intense bursts of light emitted by the flash units. When used as a separate piece of equipment the flash meter can be pointed at the light source from position of the object or person being photographed. It measures the light falling on the object or person.This is called incident rather than reflected light metering as the meter measures the light from the subject position.
Where a number of lights are being used a flash meter can be pointed at each light in turn to evaluate its power in relation to the other flash units. In this particular case things are very simple as there is only one light. The meter is placed close to the subject (the paper dog) and aimed at the camera lens. The invercone is extended to add light bouncing around the subject and a measurement made of the flash. The camera is set to this amount of exposure.
Flash meters vary a lot in their sophistication. I prefer one that is also a conventional light meter as well as this can be used in other types of photography to check camera light readings. Cameras tend to come and go but many professional photographers stay loyal to their trusted meter as it is an independent measure of exposure.
Studio lighting using flash mono blocs requires that the photographer masters the use of a flash meter. While it might be possible to guess the strength of flash light and then check the results on your camera's LCD, even a simple flash meter will help reduce the amount of time you spend in working out the individual settings for, and exposures from, each of your flash units, the ratio between their brightnesses, and the final camera settings that you use to make your picture.
The situation is made more complicated by the fact that all photographic prints and drawings have a tonal range that sets the limits to what can be done. You cannot make any part of a picture lighter than the bare white surface of the paper. Similarly it cannot get any darker than the deepest blacks that can be printed. Somehow you have to measure the light emitted by the flash units, add in any daylight or other ambient light, and work out settings that control the contrast of your picture, so that it doesn't exceed the tonal range possible in your print. Only a flashmeter can do this quickly and accurately.
The contrast of a photograph can be expressed as a lighting ratio, which is the difference between the amount of light falling on the the brightest parts of the subject compared to the amount of light in the darkest shadows.
Many flash meters come with a flat light measuring disk designed specifically for working out the lighting ratio, or, like the Sekonic L-358 flash meter I use in the studio, have a retractable dome, sometimes referred to as an invercone, which can be used to measure both the lighting ratio (while retracted) and the overall exposure (while extended). Other models may have a clip-on dome or disk, or even a sliding dome.
The way I set up lighting is to point the flat disk (or the retracted dome) towards the main light and measure the strength of that flash, then point the disk towards the secondary or fill-in lights one by one. Working round the lights one by one, I adjust each to the desired strength. When all of the lights are balanced, the invercone (extended dome ) is pointed at the camera from the subject's position and the cumulative exposure given by all of the flashes measured: the camera is then set to this reading.
Let's look at some examples of different lighting ratios, starting with very flat lighting.


Contrast ratios are closely connected with controlling light bouncing around the studio. This last picture was done on the same white background as all of the previous photos. There is just more control over where the light is allowed to fall. In this picture, no light gets on to the background at all, rendering the white surface as a near black.
I believe lighting is best learned by starting very simply with one light and a reflector, and then adding extra lights until the desired effect is achieved. Understanding flash measurement enables the photographer to achieve the desired amount of contrast to construct the picture. This forms the basis of my teaching on the one day lighting courses I run.
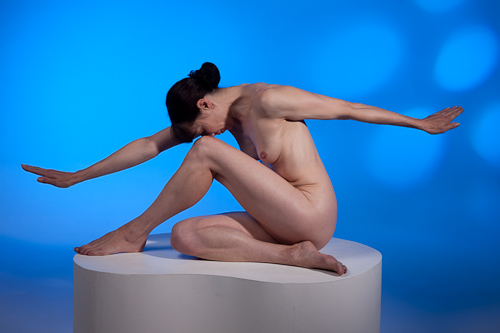
(The model in these pictures is Rosemarie Orwin, art nude and photographic model, who I found to be a pleasure to work with. Highly recommended.)
No comments:
Post a Comment