The situation is made more complicated by the fact that all photographic prints and drawings have a tonal range that sets the limits to what can be done. You cannot make any part of a picture lighter than the bare white surface of the paper. Similarly it cannot get any darker than the deepest blacks that can be printed. Somehow you have to measure the light emitted by the flash units, add in any daylight or other ambient light, and work out settings that control the contrast of your picture, so that it doesn't exceed the tonal range possible in your print. Only a flashmeter can do this quickly and accurately.
The contrast of a photograph can be expressed as a lighting ratio, which is the difference between the amount of light falling on the the brightest parts of the subject compared to the amount of light in the darkest shadows.
Many flash meters come with a flat light measuring disk designed specifically for working out the lighting ratio, or, like the Sekonic L-358 flash meter I use in the studio, have a retractable dome, sometimes referred to as an invercone, which can be used to measure both the lighting ratio (while retracted) and the overall exposure (while extended). Other models may have a clip-on dome or disk, or even a sliding dome.
The way I set up lighting is to point the flat disk (or the retracted dome) towards the main light and measure the strength of that flash, then point the disk towards the secondary or fill-in lights one by one. Working round the lights one by one, I adjust each to the desired strength. When all of the lights are balanced, the invercone (extended dome ) is pointed at the camera from the subject's position and the cumulative exposure given by all of the flashes measured: the camera is then set to this reading.
Let's look at some examples of different lighting ratios, starting with very flat lighting.

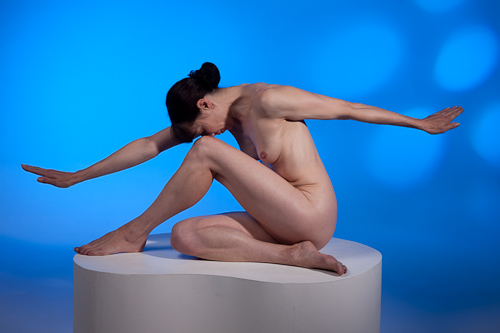


Contrast ratios are closely connected with controlling light bouncing around the studio. This last picture was done on the same white background as all of the previous photos. There is just more control over where the light is allowed to fall. In this picture, no light gets on to the background at all, rendering the white surface as a near black.
I believe lighting is best learned by starting very simply with one light and a reflector, and then adding extra lights until the desired effect is achieved. Understanding flash measurement enables the photographer to achieve the desired amount of contrast to construct the picture. This forms the basis of my teaching on the one day lighting courses I run.
(The model in these pictures is Rosemarie Orwin, art nude and photographic model, who I found to be a pleasure to work with. Highly recommended.)